Category Archives: Tactical Gear

Dye Sublimation vs Screen Printing Camo Patterns

I use a lot of screen printed fabrics. Everything from MultiCam to various digital patterns to Kryptek. There has always been an issue with putting todays complex camouflage patterns onto some of the more robust and “course” fabrics that are popular today. Think of 1000 Denier CORDURA type materials. Most of the time the pattern doesn’t look that sharp. In a nutshell the less Denier the smaller the yarns and fibers will make for a sharper image. If you need more explanation on this see this video I made on another account many years ago.

I have recently been using a few printed fabrics in my work that used the Dye Sublimation process. Instead of screen printing [See this video produced about DURO Industries (no longer in business) if you want to see screen printing in action]. Dye Sublimation is a bit of a strange process and is less efficient over large scales than screen printing but you get the benefit of being able to make smaller batches and even customizations. In a very brief nutshell Dye Sublimation take several color inks as solids and heats them up to the point where the sublimate. This means that they go from solid to gas. Skipping the liquid state. The colors are applied (under pressure) to the fabric and “sink” into the fibers. The ink/dye then returns to its solid state as part of the fabric fibers. This allows for incredible detail. Nearly any color and even gradients. It’s also known to not fad as badly due to scratching, abrasion, and washing.

Kryptek Highlander pattern comparison between Dye Sublimation and Standard Screen Printing on 1000D Material.
Kryptek Highlander pattern on 1000D material. Dye Sublimation printing from DutchWare [Left], Screen Printing from Brookwood Roll Goods [Right]

The Story

I needed a small amount of fabric in the Kryptek Highlander camo pattern. What I didn’t need was an entire roll of Highlander from Brookwood Rollgoods who currently produces Kryptek and MultiCam patterns on CORDURA materials. So, enter Dutchware. Dutchware Clips, LLC. They have a bunch of fabric offerings. One being a 1000D CORDURA print on demand service and have procured the licensing to print these patterns and can get them to your door in under a week. I didn’t really know what to expect but when it arrived I was very surprised with how sharp the pattern was. I was also afraid that a printed pattern would easily scratch off. Not the case. As stated before, Dye Sublimation is fairly resistant to abrasion. I have just started working with these materials but with about 4 weeks in I am not seeing any abnormal or early signs of wear.

A zoomed in picture of the Kryptek Highlander Pattern on a Dye Sublimation and traditional Screen Printed 1000D fabric.
The same materials as above but zoomed in. Kryptek Highlander pattern on 1000D material. Dye Sublimation printing from DutchWare [Left], Screen Printing from Brookwood Roll Goods [Right]

What’s the difference in the material?

You can see the materials in the picture. One is Brookwood produced screen printed 1000D CORDURA nylon material. The other is the 1000D Dutchware produced textured polyester digitally print on demand offering. Both are licensed by Kryptek. If you are comparing to purchasing the traditional screen printed materials by the roll then the Dye Sublimation printed material is much more expensive. But, you are able to buy less that 50 or 75 yards at a time. That makes a difference to smaller shops or those building gear in their basement. The three main differences I noticed:

  • The dye Sublimation material is left bright white on the back side. This could be an issue if you ever reverse hem your fabric and expose the back side. If so, you might have to alter your design(s).
  • The Dye Sublimation materials is also stiffer than the screen printed material. Likely nothing that will prevent you from working with it but if you already thought 1000D was to stiff then you might want to avoid this polyester.
  • There was no Urethane (UC/PU) Coating on the back of the digital print offering. This aids in the materials water repellant properties and keeps exposed edges from fraying so badly.
Even further zoomed in look at the difference between Dye Sublimation and Screen Printing.
Zoomed in further. Kryptek Highlander pattern on 1000D material. Dye Sublimation printing from DutchWare [Left], Screen Printing from Brookwood Roll Goods [Right]

What about Near Infrared?

These days everyone is worried about the NIR (Near Infrared) performance. As you may or may not know. I have tested a bunch of camo patterns in this manner and posted the findings here with more to come.

I’m afraid I have bad news. If you were hoping for these Dye Sublimation printed fabrics to be NIR compliant then you are in for disappointment. I have pieces of both the Kryptek Highland and Typhon patterns in hand. Below you can see the results. With both Gen3 and Digital Nightvision.. the moment the IR light hits the fabric the camo pattern completely disappears. Just so there is no confusion I think it is important to point out that the traditional screen printed Kryptek materials by Brookwood Roll Goods performs pretty well under IR interrogation. You can see those results here.

Kryptek Highlander

Kryptek Typhon

First Spear TUBES and other things like TUBES

Are you familiar with TUBES from First Spear? They are a great buckle. But expensive. So expensive that in my day job as a gear designer I pretty much consider them cost prohibitive except in the case of a custom built piece of gear. That really is to bad as I would love to use them more often.

First Spear TUBES 4", DuraFlex Tactik Buckle 4", Aspetto - KWIQ Clip.
First Spear TUBES 4″ (split-bar) (left), DuraFlex Tactik Buckle 4″ (center), Aspetto -KWIQ Clip (right). All with male and female sides mated.

Just in case you don’t know

In case you are not familiar with TUBES they were developed by First Spear and produced (for First Spear) by ITW. They come in two lengths (widths might be a better way to look at it). 2″ and 4″. Normally you will find the 2″ versions securing a quick detach shoulder strap on a plate carrier while you will find the longer 4″ holding the cummerbund to the plate bag. Each of the two sizes are also available in a solid-bar and a split-bar (field repair) configuration. The split-bar allows you to slip the TUBE onto a loop of webbing (if configured correctly) after it is sewn down.

Close up look at the First Spear TUBES 4" Field-Repair (Split-bar) in Coyote Tan.
First Spear TUBES 4″ (split-bar) with male and female sides separate.

Why are they good?

TUBES do a couple of things REALLY well. They can stabilize a piece of fabric (think of a cummerbund for a plate carrier) along an entire edge of that piece with only a single interface. They also offer an easy method of extracting ones self from a plate carrier. Simply pull out and up/down at the same time.

Other options

Most gear designers, gear DIY’ers, and gear-heads know of the First Spear TUBES. But, you may be interested to know there are other similarly functioning buckles. You might call them TUBES-Adjacent. All are acetal polymer construction and all are solid options with slight variations in the way they operate.

An example of several different offerings of buckles that serve the same or similar purposes.
First Spear TUBES 4″ (split-bar) (left), DuraFlex Tactik Buckle 4″ (center), Aspetto -KWIQ Clip (right). All with male and female sides unmated.

The Tactik Buckle from DuraFlex

The DuraFlex Tactik buckle first came on the scene (for me) in 2018. It was being showcased at different industry tradeshows. Originally advertised as having 1″, 1.5″, 4″ versions available. It then kind of went dark for a while. Then, all of a sudden it came available not to long ago. Well, the 4″ version anyway. We still have yet to see the 1″ or 1.5″. Like the TUBES the Tactik buckle came in two configurations (other than size) solid-bar and split-bar (for field repair or installation after production of the host piece of gear). Both pieces are 4″ tall. There are two main differences. 1) The Tactik buckles comes with the pull lanyard that is used to release the buckles. On the TUBES you normally have to make some kind of paracord pull for this function. 2) the gesture used to release is different. On the TUBES you must pull out and either up or down. This releases the locking mechanism (No springs. Everything is molded) and the up/down slides the male side out of the female. On the Tactik buckle you only pull outward on the lanyard which releases the entire buckle. One isn’t necessarily faster than the other as both releases are accomplished with a single motion. They just work a little different. I have never seen either system fail.

The Aspetto KWIQ-Clip

The KWIQ-Clip from Aspetto is the most different and I haven’t ever actually integrated them into a piece of gear. But I do have a few… because you never know. It also has no individual moving parts just like the others. Again, the release is managed by pulling on and deforming the acetal polymer material to release a latch. I believe you call this a “living latch”. The KWIQ-Clip is a full inch taller than the other buckles referenced in this write-up. The reason being is that it allows you to interface the buckle to the gear via 3 pieces of 1″ webbing. Each separated by 1″. Sounds perfect for a 3-row skeletonized cummerbund. With the other two you have to be a little creative in your gear design as they both interface with the gear using 1.5″ webbing. This usually isn’t what you find on a cummerbund. So, the Aspetto KWIQ-Clip has an advantage here in helping your gear stay simple but I can’t help but think a 5″ tall buckle has a great chance of jabbing you in the ribs or pelvis when you bend or lean. Is the 1″ difference really enough to matter? I don’t know. But that is something to keep in mind when planning your next build. The manufacturer claims a 300 lbs Tensile Strength.

Where can I get them?

First Spear TUBES
You can now get TUBES direct from First Spear. This is fairly new. You use to have to be an approved gear producer. Beware that most of the time TUBES are sold as their individual separate components (Male and Female). You need to purchase both sides. Not always though.
Direct link to 4″ Female Split-Bar on First-Spear.com
4″ TUBES Male/Female Split Bar on Agelitegear.com

DuraFlex Tactik Buckle

4″ Tactik Buckle Split-Bar at WTFIdea.com
4″ Tactik Buckle Split-Bar at 8492Nylonworks.com
4″ Tactik Buckle Solid-Bar at StratusArmament.com

Aspetto KWIQ-Clip
This buckle is sometimes sold as Male/Female or Male/Male. Make sure you get what you need.
Aspetto KWIQ-Clip on QorePerformance.com

Building your own tactical gear

Not a tutorial but a look at what you can output when you put your creativity to it. This is a one-piece custom MultiCam Tropic chest rig that I put together a few weeks back. As I state in the video description. There isn’t really anything hard about sewing your own gear. The machine can be intimidating and yes it can hurt you. But it is really all technique. You just need to put in some hours to start getting awesome results. There are resources here on 30MC that can help you. Look in the nav bar under “Tactical DIY”.

Rumble backup link: https://rumble.com/v39heaf-building-your-own-tactical-gear-30-magazine-clip.html

Tiger Stripe Chest Rig Giveaway – You can’t buy this!

It’s that time. Time for another giveaway. I have a few pieces of one-off gear that I have build over the years as a professional gear maker. Why not give a few of them away? Here we have a unique tiger stripe chest rig. Is there anything groundbreaking here? No, not really. But it is a fairly effective configuration and features a pretty nifty set of side pockets.

How to Enter

In a nutshell you need to like this video on any (or all) of the 30MC social media channels (listed below). IMPORTANT: YOU MUST SUBSCRIBE TO OR FOLLOW THOSE CHANNELS AS WELL. You can’t just hit “like”.

When a winner is selected I will verify that they follow 30MC on that platform. If not, I will have to pick another winner.

  • 1 like = 1 entry.
  • 1 comment = 1 entry.
  • Comment by tagging a friends name = you AND your friend each gain 1 entry.
  • UNLIMITED ENTRIES ALLOWED

The Channels

https://www.youtube.com/@30magazineclip https://www.instagram.com/30magclip/ https://www.facebook.com/30magazineclip/ https://twitter.com/30magclip/ https://rumble.com/user/30MagazineClip/ https://www.reddit.com/r/30magazineclip/ https://www.30MagazineClip.com

The Fine Print

Drawing will take place on or about Saturday June 3rd, 2023. Winner will be notified via PM/DM on the platform that they used to enter (ie: facebook, instagram, etc). If the winner does not respond within 1 week of being contacted a new winner will be selected. No substitutions or cash value. Void where prohibited. No Warranty. This item was built using known and good procedures and techniques. However, no extensive testing was conducted. This piece should be considered a novelty piece of gear and you should treat it accordingly. NONE of the related or unrelated equipment in this video comes with the rig. The item will be shipped to the winner free of charge to a US address. If the winner is outside of the United States they may decide to pay for the shipping charges themselves or forfeit the prize.

Where is Tactical Gear Production Headed?

I have worked the last 13 years mainly in the design side of the nylon tactical gear industry. I have seen the trends go from LBVs to plate carriers, to micro rigs, to belt setups with suspenders, to belt setups without suspenders, to recce rigs with hundreds of in-between products along the way. Entire companies have sprung up just to invent and manufacture interface devices to smash multiple pieces of industry gear together. I have even been responsible for some of them. These days you can find a piece of gear that will fit just about any mission that you might have. In the event you can’t, there are tons of smaller custom builders (like me) that can produce your one-off project to exact specifications. 

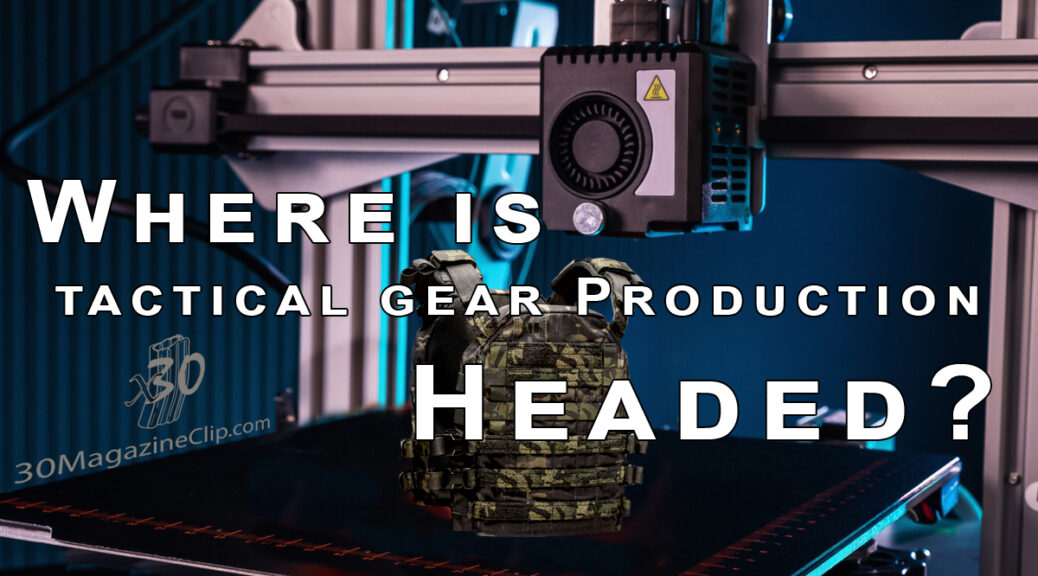
But what is the next leap? (And I don’t specifically mean in materials). You could call going from regular old Cordura to laminates and hypalon type materials a leap as it is a much better material to laser cut, but the build process is pretty much the same (i.e. you sew it together to make pockets). I’m talking about the next evolution in textile production – not just for the tactical gear industry, but that is where my experience comes from. I believe it is going to be in the world of 3D printing. That is, 3D printing the fibrous materials in a full (or nearly full) constructed state. Like, hit go on the printer and come back to a finished plate carrier a while later (perhaps a long while). Why would it be with a fibrous material? Today’s fabrics do a really good job of arresting a rip or tear before it gets too bad. This is sometimes referred to as “Ripstop”. This is accomplished by the weave of the yarns that make up the fabric. There’s no reason to throw that away. If you were to print solid flexible sheets instead there is a good chance that a “rip” would continue on over time (perhaps a short amount of time) and eventually render your equipment useless. And I’m not talking about just another plate carrier like we have today. What comes out of this theoretical fabric printer could be a design that contains build geometry that could not be produced on a sewing machine. 

Part of my business is building custom solutions for individual soldiers, police, contractors, and larpers. Sometimes those customers will send drawings of what they have in mind. However, they lack the experience of being a stitch-operator like myself. They may not realize that their drawing can’t be made the way they have envisioned it. 

For instance the attachment of a piece of fabric to form a pouch on one side might sew another pouch shut on the opposite side of the work. A good gear designer can usually find a way around this, but the situations do get complicated – especially when you consider a lot of these pieces go together in reverse and inside out. It’s a lot to get your head around until you have some time in it. However, most of these concerns would vanish if instead you are building (or printing) your gear a cross-section at a time. Layer stacked on layer of slightly varying geometry resulting in a perfectly reproducible piece every time.

Think about it: no hems, no seems, no need to have extra material folded over to help prevent the threads from pulling through a high-stressed area. Do you need an area reinforced? Simply tell the operating software that “this specific section of the design needs to be stronger” and let it do the work.

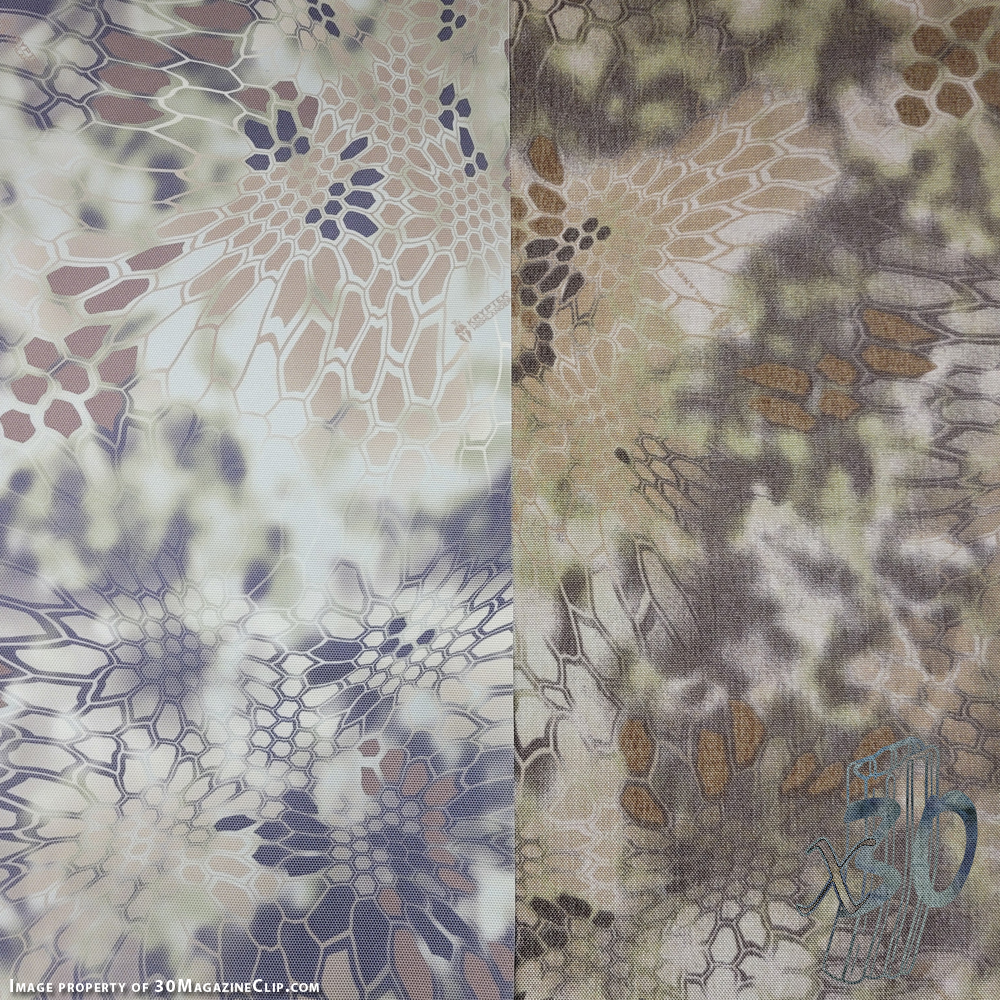
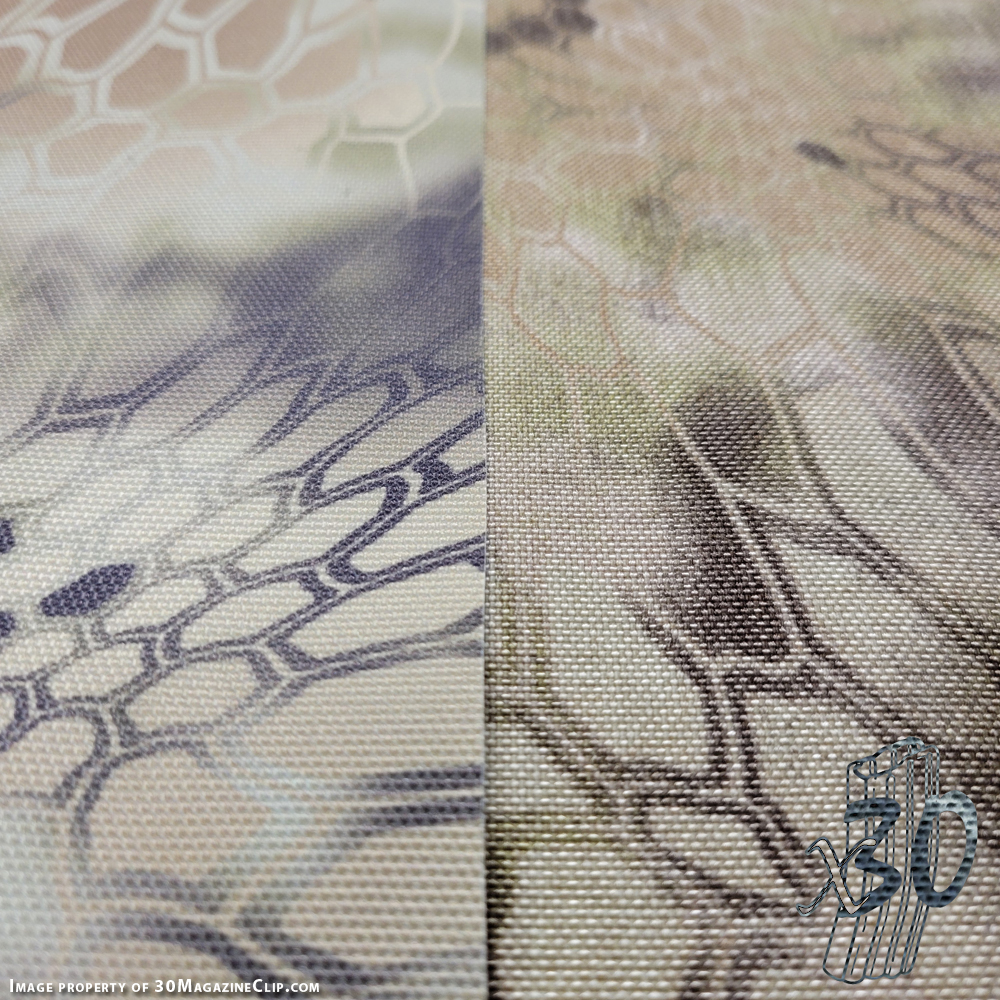
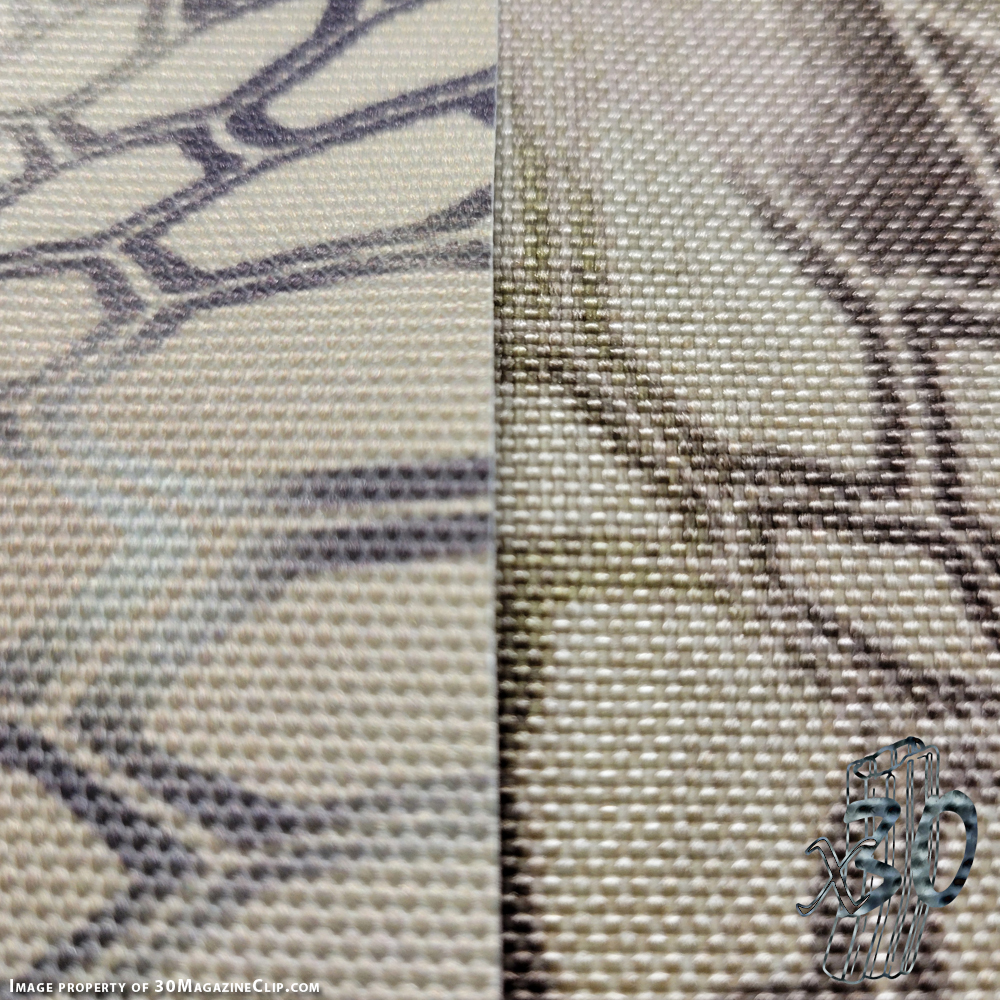
What about the camo patterns?

Just print them, too, like everything else. Now, I know this isn’t a viable option yet, but I am fairly confident that once the industry figures out how to reliably print the fibrous nylon material to a high degree of accuracy, varying the color of each layer and area in that layer will be an afterthought. We do it with 2D printers all the time.

Continue reading Where is Tactical Gear Production Headed?

3DSR Buckle. Ever heard of it?

You may or may not be aware that my day job is in the tactical gear design and production industry. Because of that I get lots of samples of new buckles either via mail or trade shows such as SHOT Show. Back in 2019 I received a few samples of the Three Dimensional Side Release (3DSR) buckle. I looked at it and tried to thank of a good use but at the time nothing came to mind. I forgot about it until it was rediscovered in a drawer at my shop. A very well thought out design and while reexamining it I wondered to myself why I hadn’t seen other gear-makers using the 3DSR. It has some great properties and the only conclusion I came up with was simply that nobody knew about it. So, here is me doing my part. If you are not aware of the 3DSR then consider yourself informed.

Image of 3DSR Buckle from Mil-Spec Monkey.

Features and Stats

  • 300 lbs load capacity.
  • Squeeze really well in your hand due to shape (easy to release).
  • Will release when overloaded instead of breaking.
  • Releases fairly easily under load.
  • Fragmentation Resistant (info below)
  • NIR (Near-Infrared Reduced).
  • 1″ webbing interface.

Properties

This is probably the most impressive part. This buckle isn’t made from the traditional acetal polymer that you usually associate with other like components. The manufacturer calls it “shatter proof” and was originally developed for USMC/ARMY pack frames and is supposed to keep its physical properties down to -40 degrees. The image below shows one of the buckles that has been shot by a 5.56 round at 20 meters (test not conducted by 30MC). You can see that the round passed through the buckle while it was mated together. The buckle pictured was still operational after taking the damage. An accidental disengagement of the 3DSR is unlikely as you must squeeze both sides to release.

Image of shot 3DSR buckle from documents from Down East Innovation, LLC.

As I stated before I am not exactly sure where this buckle would be used to the greatest effect in the “tactical space”. Perhaps in the should straps of plate carriers or even a on-riggers type of gun belt. It seems a bit wide to be used as a quick detach element on a rifle sling.

There you have it. The 3DSR. I promise to not take four years to report on an innovative components I come across, next time.

Most resellers of the buckle have it listed as an ITW Nexus product but I don’t believe that is the case. The confusion probably came from the fact that Fastening Systems distributes the buckle and they are largely associated with ITW due to the volume of ITW components that they ship.

Purchasing

I receive nothing from your purchase of this item. A simple google search revealed a few places where the 3DSR is available.

Digital Night Vision. Has it arrived?

Digital night vision technology has come a long way in recent years and has become increasingly popular for a variety of purposes, including surveillance, hunting, and other outdoor activities. It works by sensing in low light conditions and then amplifying that available light via software to create an image. The resulting image is displayed on a screen, typically a LCD screen. Digital night vision devices are generally more affordable and easier to use compared to traditional analog night vision. However, the quality of the image may not be as good as that of traditional night vision devices, and they may not work as well in complete darkness.

In this video Isaac Botkin lays down another dissertation level analysis of the current state of digital night vision. Specifically the SiOnyx Opsin. Personally, I will continue to stay analog but the future of digital night vision looks.. bright.